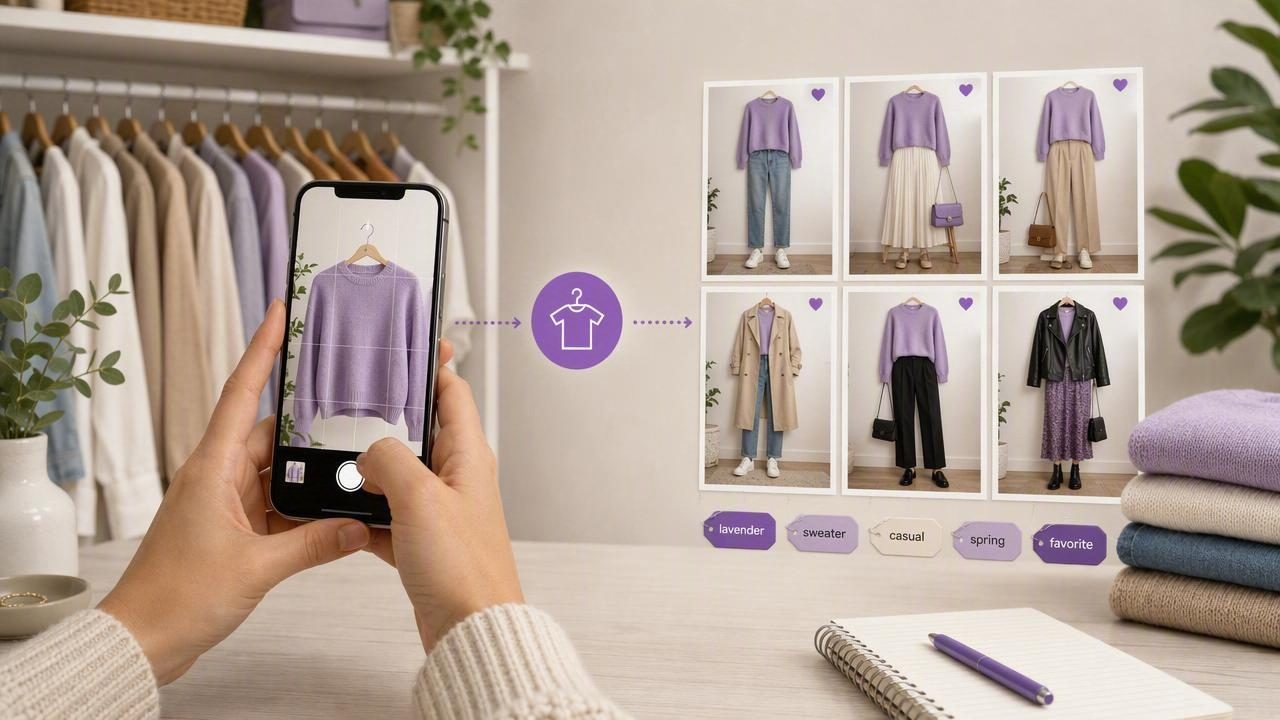
If opening your closet feels overwhelming, organizing clothes by photo can make getting dressed far simpler. A visual clothing catalog lets you see what you own, identify duplicate purchases, build outfits faster, and make better use of pieces that usually stay hidden in drawers or at the back of a rail.
Unlike a written inventory, photos provide immediate context. You can quickly spot colors, silhouettes, fabrics, prints, and items that work well together. Whether you use a notes app, album folders, spreadsheet, or a dedicated digital wardrobe, the goal is the same: create a reliable visual record of your clothing that supports real-life outfit decisions.
This guide explains how to organize clothes by photo, from taking useful images to tagging items, creating outfit groups, and maintaining your catalog without turning it into a time-consuming project.
Why Organize Your Clothes With Photos?
A photo-based closet system gives you a full view of your wardrobe without needing to pull everything out. This is especially helpful when you have limited storage, seasonal clothing packed away, or a busy morning routine.
- See your wardrobe clearly: Photos reveal how many similar items you own and which categories are missing.
- Plan outfits anywhere: You can browse tops, trousers, shoes, and layers from your phone while traveling, shopping, or planning the week.
- Reduce impulse purchases: Checking your visual inventory before buying helps prevent duplicates.
- Use neglected clothes: Items you forgot about become visible again.
- Pack with confidence: A photo catalog makes it easier to build travel outfits around a small number of versatile pieces.
- Improve outfit experimentation: You can compare combinations before changing clothes or trying them on.
The system does not need to be perfect. A practical wardrobe photo library is more valuable than an immaculate catalog that you abandon after one weekend.
Step 1: Decide What You Want Your Photo Closet to Do
Before photographing anything, define the main purpose of your system. This determines how much detail you need to record. Someone building a minimalist capsule wardrobe may only need clean item photos and broad categories. Someone who plans workwear, events, travel, and seasonal outfits may benefit from more specific tags.
| Goal | Useful information to record | Best organizational focus |
|---|---|---|
| Dress faster daily | Category, color, season | Simple albums and saved outfits |
| Stop buying duplicates | Brand, color, fit, condition | Detailed item catalog |
| Build a capsule wardrobe | Versatility, neutral/accent color, outfit count | Mix-and-match groups |
| Plan trips | Weather suitability, packing status, occasion | Travel album or packing list |
| Track personal style | Silhouette, fabric, favorite outfits | Inspiration and outfit comparison |
Start with one or two goals. If you try to track every clothing detail from the beginning, the setup can become unnecessarily difficult.
Step 2: Gather and Sort Before Taking Photos
You do not need to empty your entire home at once. Work by category: tops first, then trousers, dresses, outerwear, shoes, and accessories. This smaller-batch approach helps you stay focused and makes your photo collection more consistent.
As you gather items, make quick decisions about what deserves a place in your catalog:
- Keep pieces you currently wear or realistically expect to wear.
- Set aside clothes that need repair, tailoring, laundering, or replacement.
- Separate donation, resale, and recycling candidates.
- Skip worn-out basics that are leaving your wardrobe soon.
This process often reveals an important truth: organizing is not only about storing information. It is also about editing your wardrobe so the catalog reflects clothes that support your current lifestyle.
Step 3: Take Clear, Consistent Clothing Photos
Good photos make every later step easier. They do not have to look like professional e-commerce images, but they should accurately show the item’s color, shape, and useful details.
Choose a simple photo setup
Use a plain wall, clean floor, bedsheet, or garment rack as your background. Natural daylight near a window usually produces the most accurate colors. Avoid strong shadows, yellow overhead lighting, busy prints, and clutter that distracts from the garment.
For most items, place the clothing flat or hang it on a simple hanger. Keep the camera directly above flat-lay items or directly in front of hanging pieces to reduce distortion. Photograph shoes as pairs, and include accessories individually when they are important to your outfits.
Photograph the details that matter
Take one main image for each item, then add extra photos only when needed. A jacket may need a front photo plus a close-up of a distinctive lining. Trousers may need a photo that shows the leg shape and waistband. If fit is difficult to remember, include a mirror photo of the item worn.
- Steam, fold, or hang the item neatly.
- Use the same background and lighting whenever possible.
- Capture the full item in frame.
- Take a second image for unusual texture, print, or detail.
- Review the photo immediately and retake blurry images.
Tip: Consistency matters more than perfection. Uniform photos make it easier to scan a digital wardrobe and compare items at a glance.
Step 4: Create a File Naming and Folder System
If you are organizing clothes by photo manually, a basic naming structure prevents your image library from becoming a long list of vague filenames. A useful formula is:
category_color_item_style_or_brandFor example:
top_white_button_down_oxford.jpg
trousers_black_wide_leg_wool.jpg
shoes_brown_ankle_boots_leather.jpg
You do not need to rename every image if your phone system makes that inconvenient. Instead, use albums or folders with clear category names. A simple starting structure might include:
- Tops
- Bottoms
- Dresses and jumpsuits
- Outerwear
- Shoes
- Bags and accessories
- Seasonal storage
- Saved outfits
Within each category, sorting by color can be useful if your wardrobe is large. For smaller collections, category folders alone are usually enough.
Step 5: Add Tags That Help You Make Decisions
Photos show appearance, but tags make your visual closet searchable and more useful for fashion planning. The best tags answer practical questions: What can I wear in rain? Which tops work for the office? What items have I not worn recently?
Begin with a small set of repeatable tags:
- Category: blouse, jeans, blazer, trainers, tote bag.
- Color: navy, cream, olive, black, multicolor.
- Season: warm weather, cold weather, transitional, all-season.
- Occasion: casual, work, evening, formal, travel, exercise.
- Fabric or function: linen, wool, waterproof, wrinkle-resistant, machine washable.
- Fit: oversized, tailored, cropped, high-rise, relaxed.
Add advanced tags only if they solve a real problem. For example, a “needs tailoring” label can stop you from choosing trousers that are not ready to wear. A “packing favorite” tag can speed up travel planning. A “rarely worn” tag can help you evaluate whether an item should stay.
Step 6: Build Outfit Photos, Not Just Item Photos
A clothing catalog becomes much more powerful when you save combinations that work. Create outfit photos from mirror selfies, flat lays, screenshots, or side-by-side item collages. Include shoes, outerwear, and accessories when they change the overall result.
Organize saved outfits by the way you actually dress. For example:
- Easy weekday outfits
- Office looks
- Weekend casual outfits
- Date night or event outfits
- Hot-weather combinations
- Cold-weather layers
- Travel outfits
When you discover an outfit you enjoy wearing, save it immediately. You are building a personal reference library, not trying to create a fashion magazine. Notes such as “comfortable for walking,” “works with a long coat,” or “best for 15–20°C” make saved looks even more useful.
Step 7: Use Your Photos for Weekly Fashion Planning
The most effective visual closet routines happen before busy mornings. Spend 10 to 15 minutes once a week reviewing the forecast, calendar, laundry situation, and upcoming plans. Then choose several outfits from your photo collection.
Try this weekly workflow:
- Check the weather and any dress-code requirements.
- Choose a few base pieces, such as trousers, jeans, or dresses.
- Select compatible tops, layers, and shoes from your catalog.
- Save three to five outfit options.
- Set aside garments that need washing or steaming.
- Adjust your plan when your schedule changes.
This approach keeps outfit planning flexible. You do not need to assign every day in advance; simply having a shortlist reduces decision fatigue.
How a Digital Wardrobe and Virtual Try-On Can Help
Manual photo albums work well, but a dedicated smart closet organizer can make sorting, searching, and outfit creation more efficient. Digital wardrobe tools may allow you to tag garments, group clothing by category, save looks, and compare combinations in one place.
A virtual try-on feature can be particularly useful when deciding between unfamiliar combinations, testing styling ideas, or planning outfits without repeatedly changing clothes. An AI outfit generator can also suggest combinations based on the pieces you have already cataloged, which may help you rediscover overlooked items.
The technology should support your judgment, not replace it. Consider comfort, fit, weather, and how you want to feel that day before committing to any suggested outfit.
Keep Your Photo Closet Accurate Without Overdoing It
Your catalog only works when it reflects your current wardrobe. Fortunately, maintaining it is easier than the initial setup. Add photos when you buy something worth keeping, remove images when an item leaves your wardrobe, and update seasonal pieces when you bring them out of storage.
Set a quick quarterly reminder to review your collection. Delete items that no longer fit, mark pieces needing repair, and notice categories you overbuy. This small habit keeps your visual closet useful while helping you shop more intentionally.
Final Thoughts
Learning how to organize clothes by photo is less about creating a flawless inventory and more about making your wardrobe visible, usable, and aligned with your life. Start with one category, use clear photos, apply a few meaningful tags, and save outfits you genuinely enjoy wearing. Over time, your catalog can become a practical tool for getting dressed faster and buying with more confidence.
If you prefer an app-based approach, a tool such as Outfit Maker can bring clothing photos, outfit planning, and virtual outfit exploration into one digital workspace.
