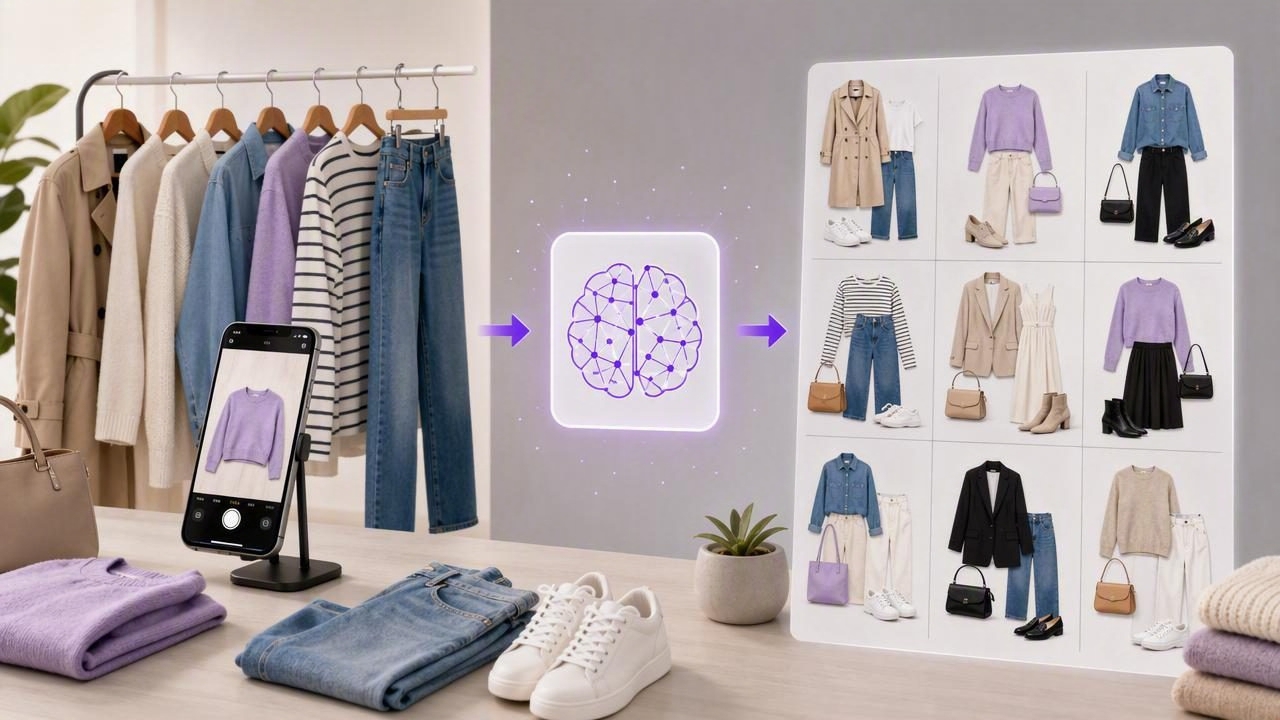
Taking photos of your clothes is one of the most practical ways to build a digital wardrobe. Once your garments are photographed and easy to find, an AI outfit generator can help you explore outfit combinations from items you already own rather than relying on memory, a crowded closet, or last-minute decisions.
However, useful clothing photos do not need to look like professional e-commerce images. The goal is not perfection. It is to create clear, consistent images that help you recognize each item, compare pieces, and visualize outfits more easily. A simple system also makes it far more likely that you will keep your smart closet organizer current over time.
This guide explains how to get organized clothing photos with an AI outfit generator, including what to photograph, how to set up your images, which details to capture, and how to avoid common cataloging problems.
Why organized clothing photos make outfit planning easier
A physical wardrobe is visual, but it is not always easy to scan. Clothes may be folded, hidden behind other pieces, in laundry, stored seasonally, or simply forgotten. Photos turn your wardrobe into a browsable collection where you can see a blue blouse next to your trousers, jackets, shoes, and accessories without pulling everything out.
For an AI outfit generator, the quality and clarity of your clothing photos affect how easily you can identify the garments you want to use in an outfit. Organized images also help you answer practical questions, such as:
- Which tops work with these wide-leg trousers?
- Do I already own a layer for a cool evening?
- What shoes have I not worn recently?
- Can I create several work outfits from the same three pieces?
- Which items should go into a travel outfit plan?
The benefit is less about creating a perfectly styled image library and more about reducing decision fatigue. When your clothes are visible in one digital space, fashion planning becomes a manageable visual task.
Start with a realistic photo goal
Trying to photograph every item in one afternoon can feel overwhelming, especially if you have a large wardrobe. Instead, begin with the clothing categories you wear most often. This gives you an immediately useful digital wardrobe while leaving room to add less frequently worn pieces later.
A practical starting list includes:
- Everyday tops you wear regularly
- Jeans, trousers, skirts, and shorts
- Favorite dresses or jumpsuits
- Outerwear and layers
- Frequently worn shoes
- Key accessories, such as bags, belts, or scarves
Start with 20 to 40 items rather than your whole closet. Once those photos are organized, you can create outfit combinations quickly and see the value of continuing. Add seasonal clothing, occasionwear, and rarely used items during later sessions.
Create a simple photo setup for consistent results
Consistency matters more than expensive equipment. When every clothing photo has a similar background, angle, and lighting level, it becomes easier to compare colors, silhouettes, and proportions. You can use a phone camera, a blank wall, a closed door, or a clean floor space.
Choose a neutral background
A plain white, beige, gray, or light-colored background helps the garment stand out. Avoid patterned bedding, overflowing laundry piles, or busy rooms whenever possible. A neutral background reduces visual distractions and makes it easier to spot details such as necklines, sleeve lengths, and hem shapes.
Use even natural light
Photograph clothes near a window during daylight when possible. Indirect light is often best because it reduces harsh shadows and helps preserve a garment’s true color. If direct sun is unavoidable, move slightly away from the window or use a sheer curtain to soften the light.
Artificial lighting can work as well, but try to use the same room and lighting setup for each session. Mixed warm and cool light may make black, navy, cream, and gray clothing look inconsistent across photos.
Keep the camera angle repeatable
For hanging garments, take photos straight on at roughly chest height. For flat-lay images, stand directly above the garment rather than shooting at an angle. A repeatable viewpoint makes your digital closet feel organized even if your wardrobe itself is not color-coded or minimal.
Pick the best method for each type of item
There is no single correct way to photograph clothes. The best method depends on the garment and the information you need to see.
| Photo method | Best for | Useful tip |
|---|---|---|
| Hanger photo | Shirts, dresses, jackets, blouses | Use a simple hanger and fasten buttons or zips. |
| Flat lay | T-shirts, knitwear, jeans, scarves | Smooth obvious wrinkles and arrange sleeves naturally. |
| Worn photo | Statement pieces, dresses, fitted layers | Use it to understand styling, not exact sizing or fit. |
| Close-up detail | Prints, textures, hardware, unusual fabrics | Add one detail image only when the main image misses something important. |
| Pair photo | Shoes, earrings, bags, gloves | Keep both items in frame and use a clear background. |
For most garments, one clear front-facing image is enough. Add a second image only when it shows information that changes how you would style the piece, such as an open back, an oversized fit, a bold print, or a contrasting lining.
Prepare garments before taking photos
You do not need to steam every T-shirt or stage every image perfectly. Still, a few quick adjustments can make a major difference in how useful a photo becomes.
- Close buttons, zips, and ties so the garment’s shape is clear.
- Empty pockets and remove lint where practical.
- Turn the item right side out.
- Lay sleeves, collars, and hems flat.
- Photograph matching sets together, then separately if you also wear the pieces apart.
- Use the same hanger style where possible for a cleaner visual catalog.
Do not delay your project because an item is not perfectly pressed. A slightly wrinkled but recognizable shirt is more useful in a digital wardrobe than a shirt you never photograph.
Capture details that improve outfit combinations
A clothing photo should answer the questions you would ask while standing in front of your closet: What color is this? What type of garment is it? Is it casual or dressy? Does it have a noticeable pattern or texture? Can it be layered?
When images are clear, you can make better outfit comparisons. For example, a plain black midi skirt may appear similar to another black skirt at a glance, but one may be satin and formal while the other is ribbed knit and casual. Photographing the texture clearly—or adding a short label—helps distinguish them.
Consider noting these details in your digital wardrobe when the option is available:
- Category: blazer, cardigan, straight-leg jeans, ankle boots
- Color: olive, cream, dark denim, burgundy
- Pattern: solid, striped, floral, checked, graphic
- Season: warm weather, transitional, cold weather, all-season
- Occasion: casual, work, evening, travel, formal
- Care or comfort notes: needs ironing, warm, restrictive, rain-friendly
These notes do not have to be exhaustive. A few accurate labels are more valuable than a complicated tagging system you abandon after a week.
Use file names and categories you can maintain
If you store photos on your phone before adding them to a digital wardrobe, simple file names can prevent confusion. Avoid names such as IMG_4839 when you have several similar items. Instead, use a descriptive pattern:
category-color-item-detail
bottoms-dark-denim-straight-jeans
outerwear-camel-wool-coat
tops-white-cotton-button-shirt
You do not need to rename every image manually if your chosen organizer lets you sort or label items after upload. The principle is the same: create enough structure that you can find an item without scrolling through hundreds of nearly identical thumbnails.
Build your digital wardrobe in useful batches
Batching reduces the effort of clothing photography. Rather than taking one photo every time you remember an item, group your work by category or season. You will spend less time setting up and produce more consistent images.
Try this low-stress schedule:
- First session: Photograph your most-worn tops and bottoms.
- Second session: Add layers, dresses, and shoes.
- Third session: Add bags, accessories, and special-occasion clothing.
- Seasonal refresh: Photograph items brought out of storage and archive items you donate or no longer wear.
This approach helps prevent a common digital closet problem: an incomplete catalog that contains only shirts or only recent purchases. A balanced collection gives you more realistic outfit options because it includes the layers, shoes, and accessories that finish a look.
Make photos useful for virtual try-on, with realistic expectations
Organized garment photos can support virtual try-on and style visualization by helping you see possible combinations before getting dressed. A full-body photo of yourself, taken in clear lighting and simple clothing, can also be helpful when exploring how colors, lengths, and layers may look together.
It is important to understand the limitation: AI-generated outfit visuals are best used as a planning and styling aid, not as a guarantee of exact fit. An image cannot reliably predict how fabric will stretch, drape, feel, move, or fit your specific body in real life. It may also simplify textures, proportions, patterns, and small design details.
Use virtual outfit visualization to narrow choices and inspire combinations, then confirm comfort, fit, and practicality by trying the outfit on.
For instance, you might compare a cream sweater with dark jeans and ankle boots against the same sweater with black trousers and loafers. The visual can help you decide which direction feels more polished for work. Before leaving, you would still check the trouser length, whether the sweater layers comfortably under your coat, and whether the shoes suit your plans.
Common clothing photo mistakes to avoid
Small mistakes can make a wardrobe catalog harder to use, but they are easy to correct over time.
- Photographing multiple garments as one item: A styled outfit photo is useful for inspiration, but photograph individual pieces too if you want flexible combinations.
- Using dark or cluttered backgrounds: Details disappear, particularly on black clothing.
- Taking photos too far away: The item becomes hard to identify in a thumbnail view.
- Adding every item without categories: A large unsorted collection is still difficult to browse.
- Ignoring shoes and outerwear: These pieces often determine whether an outfit works for weather and occasion.
- Never updating the catalog: Remove donated clothing and add new favorites so suggestions reflect what you actually own.
Turn your photos into a repeatable fashion planning habit
Once your clothing photos are organized, use them before a busy week, event, or trip. Choose a few anchor pieces, such as one pair of trousers, a jacket, or comfortable shoes, then create several combinations around them. Save the looks you want to wear so you are not making the same decision again on a rushed morning.
For travel, filter mentally or digitally for weather-appropriate items, then identify pieces that work in multiple outfits. A navy trouser, white shirt, light knit, and comfortable sneaker can create several looks with fewer packed items than a collection of one-time outfits.
If you want guidance on turning garment images into a practical closet catalog, Outfit Maker’s digital closet guide offers a useful starting point for organizing your wardrobe visually.
Final takeaway
The best clothing photos for an AI outfit generator are clear, consistent, and easy to browse. Start small, use a neutral background and steady lighting, photograph garments individually, and capture only the details that help you style them. Over time, your digital wardrobe can become a dependable record of what you own and a practical tool for planning outfits with more confidence and less closet stress.
